Car Touch screen repair? Can you complete it yourself? A lot of questions, but here you can learn all about repairing a car touchscreen. This page will help you learn how to fix car touch screen repair issues using simple actions and methods!
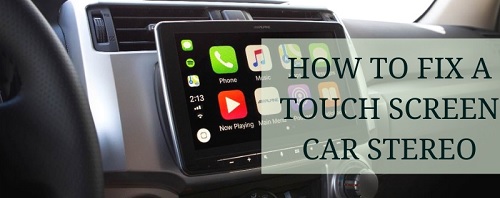
How To Repair A Touch Screen Car Stereo
Car stereos with touch screens are significantly more user-friendly than their analog equivalents. Instead of spinning knobs, you may change the stations or control the volume by simply touching them with your fingertips. Some have advanced features such as GPS, video streaming, phone integration, and more! They aren’t immune to difficulties, unfortunately. The touch screen feature is frequently the first to break down. Don’t be discouraged if the screen has been accidentally shattered or has become useless and does not respond. If your car radio is locked by code then you can repair it with a radio code that you must enter once your device opens the front screen lock!
We’ll show you how to repair a touch screen vehicle audio step by step. So, rather than purchasing a new model, you can try to repair it yourself!
What Are The Most Serious Issues With Touch Screen Car Stereos
Let’s have a look at some of the most common issues with touch screen car stereos. It’s crucial since you’ll be aware of any concerns that arise in the future and will be able to promptly handle them.
The first issue is a lack of reactivity. Only when the touchscreen is incredibly sensitive to your fingers is it enjoyable. But, no matter how many magical spells you cast with your fingers, if the screen doesn’t respond, it can be extremely irritating.
Touchscreen car stereos are unfortunately not unusual to become unresponsive. It can happen for a variety of causes. For example, if the screen’s calibration has been lost, it won’t respond as expected because it won’t be able to appropriately register touch pressure. The touchscreen can also become unresponsive due to grime and dust accumulation. If not cleaned regularly, these filths can permanently damage the component!
The second issue is a wiring issue. Your touchscreen will stop working if there is a problem with the internal wiring. You may not even be able to turn it on in some circumstances. This can happen as a result of a defective installation, which isn’t difficult to rectify. The wires can loosen up as a result of severe vibration.
Susceptible To Physical Harm
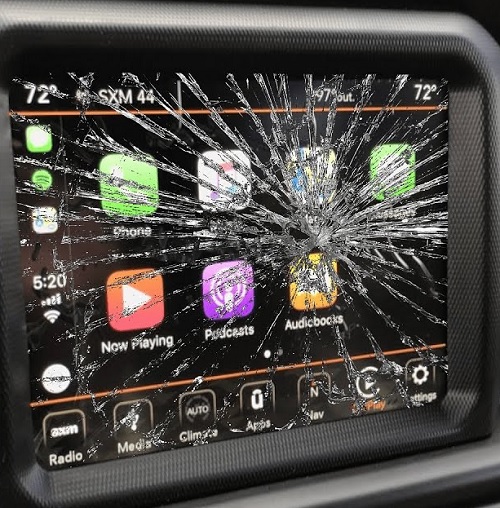
Touchscreens are prone to physical damage due to their fragility. They are prone to breaking. If your automobile, for example, goes over a speed bump too forcefully, you’re likely to get a few cracks or, in the worst-case situation, a cracked display!
If you strike the screen by accident, it will also break. Furthermore, continuous touching might cause scratches, which can lead to serious harm in the future. If you want them to last a long time, you’ll have to be particularly careful when using them.
The fourth Issue: Software Error. To work properly, smart touchscreen car stereos rely on software. They can do what they do thanks to millions of codes. It’s not unusual for software to contain faults and problems. When this happens, your stereo will stop working properly. It will begin to malfunction until you find a solution to the software problem.
These are the most prevalent touchscreen vehicle stereo problems. We haven’t gone through everything, so you might come across something we haven’t mentioned.
Two Major Issues And How To Resolve Them
Now we’ll look at the issues with touchscreen car stereos and provide you with a step-by-step strategy for correcting them. This is a guide on repairing both single and double din screens.
How To Repair A Car Stereo With An Unresponsive Touch Screen
There are a few things you may do to fix a touchscreen car stereo that isn’t responding.
- First, try resetting the stereo. Restart your infotainment system before you do anything else. Rebooting has a wonderful ability to repair modern things, so you may be in luck! By pushing and holding the power button for 5 to 10 seconds, most devices can be rebooted.
- Thoroughly clean the touchscreen. Cleaning your touchscreen with a soft cloth is an excellent idea. Keep in mind that you don’t want to damage the screen, so proceed with caution. Before you do anything, make sure your hands are clean. After that, take out the old screen protector. After that, gently rub the screen with a clean cloth dipped in a screen-cleaning solution. Apply for new protection after you’ve finished. This could be the answer!
- Carry out a factory reset.
You can conduct a factory reset as a final option to repair your device. If you have an Android head unit, things are a lot easier. Even if the screen is completely unresponsive, a USB keyboard can be used to complete the work.
A hard factory reset will correct any software issues as well as the calibration. As a result, car audio touch screen repair should be easier now. The majority of stereos come with instructions on how to execute a factory reset.
How to Repair A Car Stereo With A Broken Touch Screen
There is no other option than to replace your touchscreen if it is fully broken. It’s a lot simpler than you think, and you can do it on your own, even if you’ve never done anything like this before. For your convenience, we’ll provide a step-by-step tutorial on touchscreen radio repair!
Tools Required
The following are the tools you’ll need to finish the procedure. As a result, make sure they’re all within reach.
- The right screwdrivers
- Remover of panels
- Microfiber cloth that is clean
- Cleaner for the Screen
- Double-sided tape
- A fresh sheet of screen paper
Remove the car stereo in the first step. The first step is to remove the car stereo from the dashboard of your vehicle. Take the panel remover and separate the panels with it. Then loosen the screws that hold the stereo in place inside the cabinet. Carefully disconnect the wires before removing the gadget. Because you’ll be rewiring later, keep track of the cables you’re disconnecting.
Take apart the car stereo. Place the stereo in a safe and secure position where you may work on it freely now that it is wire-free. Take out your screwdriver and begin unscrewing all of the screws on the surface. After that, open the front panel. You’ll see several locks on the car stereo’s body that you’ll need to unlock. This can be accomplished by exerting a small amount of force in the desired direction. You may also remove panels with the panel remover.
Disconnect the screen panel’s main wires. You’ll be able to see everything inside the stereo after the chassis is completely open. Take a look around the inside. You must locate a series of circuits and several cables that lead directly to the screen panel. Detach these wires gently now.
Steps To Complete The Second Issue
Disconnect the touchscreen in step 4. The wires that are attached to the touchscreen must be disconnected in the same manner. You may or may not need to remove the screws from the motherboard, depending on where it is located. Make sure the touchscreen is not connected to the motherboard in any way.
Dispose of the damaged touchscreen. Instead of screws, the touchscreen is frequently mounted with glue or adhesive. So, before you remove the screen, you’ll need to loosen the adhesive. When you’re finished, the LCD will be fully exposed!
Cleaning the LCD is the 6th step. Now, gently clean the LCD with the screen cleaner to remove any remaining dust or debris. The microfiber cloth will be useful, so make use of it to achieve the greatest outcomes. However, you don’t want to push too hard.
Put The New Touchscreen In Place. Now is the time to install the replacement touchscreen after you’ve finished cleaning the LCD. For attaching the new component, you should use a high-quality, strong adhesive such as double-sided adhesive tape. To get the best results, cut the tapes into thin and long sections. After that, peel one side of the tape and lay it on both sides of the new screen. Peel off the other side after that. Now, make sure the screen is exactly aligned with the panel. The wires must also be properly positioned. After that, carefully position the touchscreen on the panel.
To properly attach the screen, you may need to use a little force. Because the connection must be airtight, leave no room for air to enter!
Reinstall
Add a screen protector in step 8. Before putting everything back together, make sure to use a screen protector to safeguard the screen from dust and scratches. This will spare you the effort of having to re-open everything simply to put a screen protector on later.
Carefully reconnect and rebuild everything.
Do you recall how you unplugged everything? Now you’re trying to do the same thing backward! Reconnect those cables by grabbing hold of them. Before connecting the panel wires to the motherboard, make sure the screen’s wires are connected to the panel.
Install the motherboard by screwing it in place. The chassis should then be closed. The stereo wires must then be reconnected to the automobile. That’s all there is to install. Your new touchscreen is now ready to use!


